 I pretty much grew up eating Franco’s fish ‘n’ chips down on Aberavon seafront and I know anyone who reads this, who has also experienced the creamy, deep fried chip that Franco’s offer will agree they are the best chips ever. I’ve often found myself eating chips in other places, both in the U.K and abroad and comparing them to the humble chip at Franco’s and none of them are as good. Even now while I write this I can taste the distinctive flavour of their fatty product and all I want to do is rush out and get me some.
 However, this post isn’t about Franco’s chips, this post isn’t even about Aberavon, it is about rissoles and one which was inspired by the cheesy rissole that Franco’s offer.
As the cheesy rissole is the only vegetarian option Franco’s make, I’ve found myself enjoying one many a time with a side of chips; staring aimlessly out over the oil slicked waves to Swansea, savouring every mouthful of that deliciousness.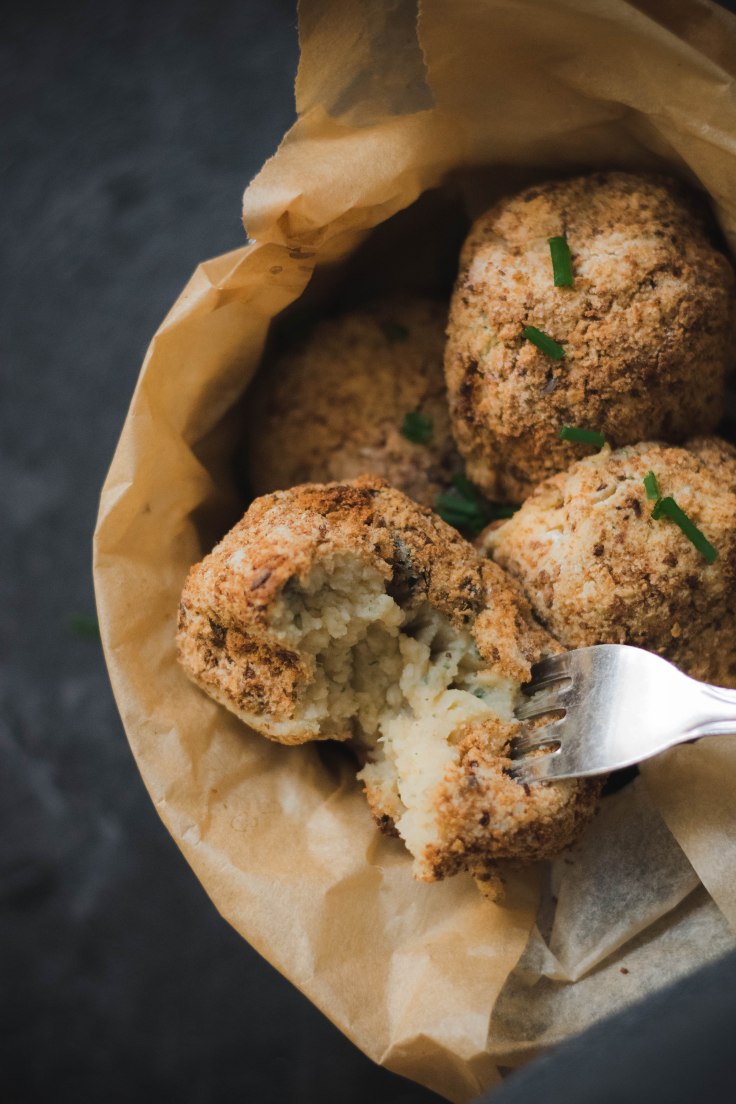 Now that dairy no longer agrees with my me and I’m vegan, I decided to try and make my own vegan Cheezy rissoles in the hope I could recreate that delightful treat I’ve enjoyed many times over the years as a vegetarian.Obviously my vegan rissoles aren’t as good as Franco’s rissoles and rightly so: creamy, cheesy and deep fried, I was never going to achieve that. However, they still didn’t disappoint my hungry tastebuds.
Ingredients
- 1000g White Potato
- 200g White Onion or Leek (finely chopped)
- 1/3 Cup Nutritional Yeast
- 125ml Non- GMO Soy Milk
- 30g Margarine
- 100g Vegan Cheese (optional)
- 1-2 Tsp Garlic Powder
- 1.5 Tsp Onion Powder
- 2 Tsp Dijon Mustard
- 2 Handuls Fresh Parsley
- 1 Tsp Thyme
- 1 Tsp Sea Salt
- 1/4 Tsp Black Pepper
Breadcrumbs
- 2 Slices of Wholemeal Bread
Directions
Pre heat an oven to 175c (fan assisted)
Peel and chop the potatoes and place them in a saucepan to boil. Remove when they are soft enough to mash.
Heat a frying pan with the vegan butter and when hot enough, sautée the finely sliced leek or onion until it starts to soften.
Mash the potatoes and stir in the ingredients, including the leek.
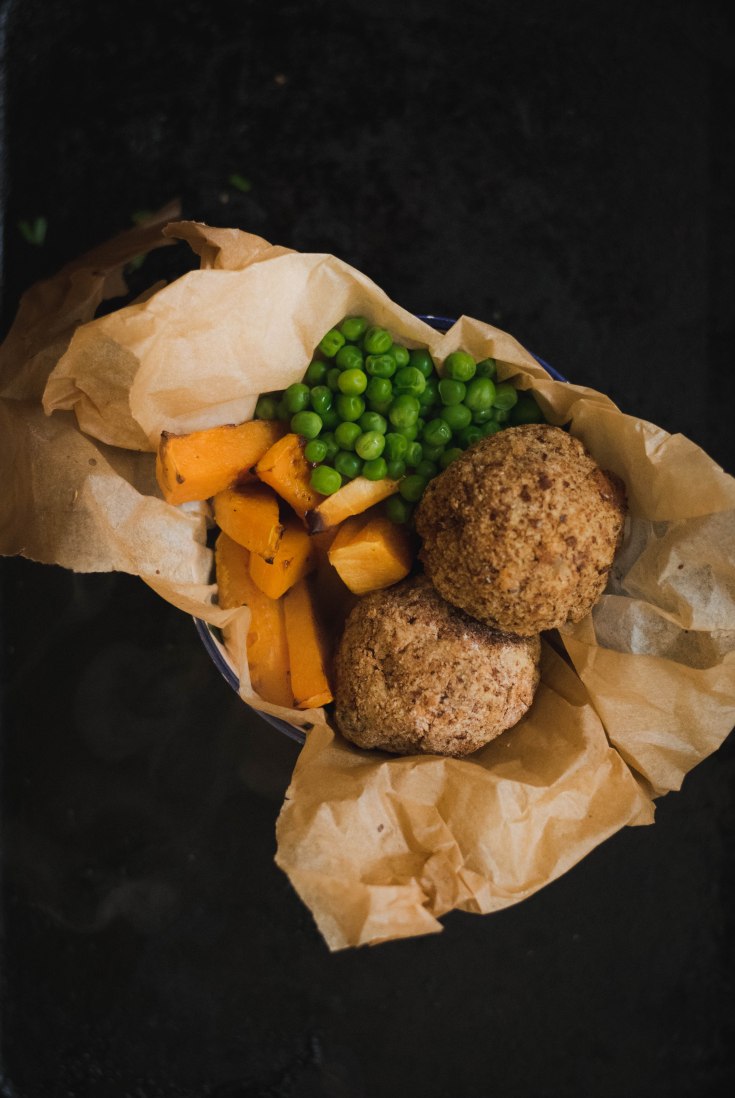
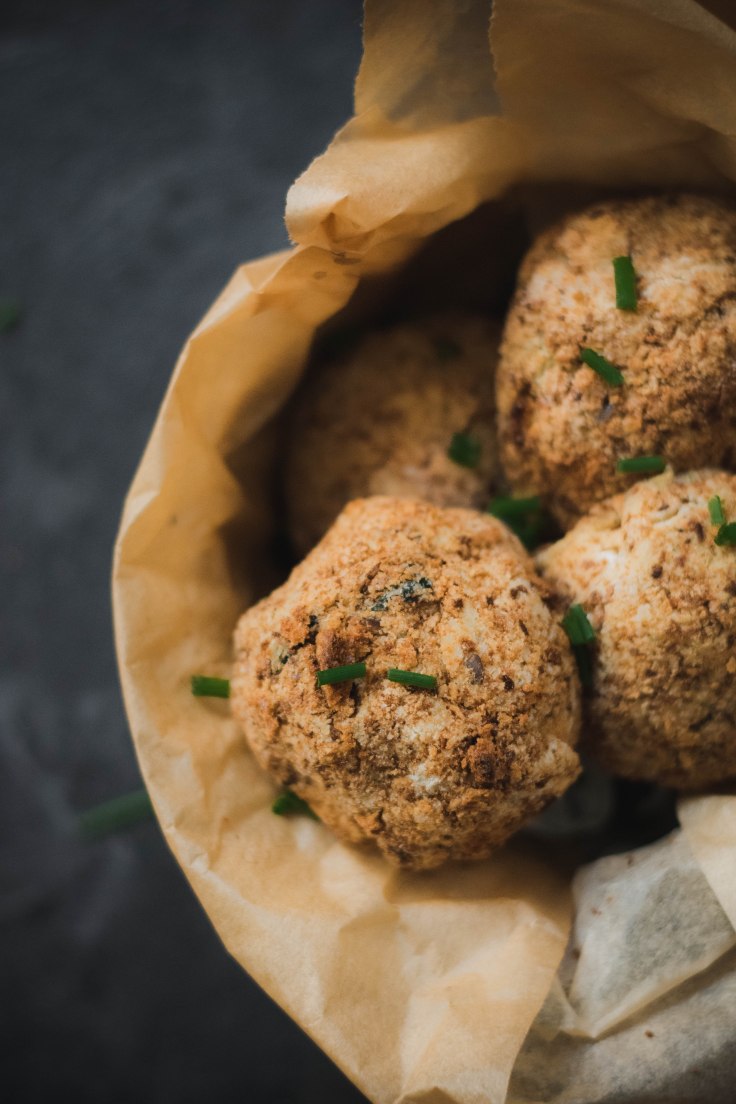
Now leave the rissole mixture to cool, before forming it into large balls and coating it in the breadcrumbs. When the rissole mixture cools, it will be easier to form into balls.
Place the rissoles on a lined baking tray – I also sprayed them with low fat spray – before popping them into the oven for 15 minutes or until they are golden all over.
NB: You can also deep fry these babies for a truly authentic british rissole.
Now serve with some chips and peas, sit back and imagine you’re at the beach.
For more vegan recipes follow me on Instagram and please tag me in any of the recipes you try here, as I would love to hear your feedback, whether it’s good or bad.
© The Hungry Welsh Girl 2016
All photos, recipes and texts are copyrighted unless otherwise stated.
All Rights Reserved.
 I’ve been craving a bounty bar all week, but as we all know, they aren’t that healthy for us. I always feel bounty bars are a waste of calories too because they are always so bland and dont even remotely taste like coconut in my opinion – plus they’re not vegan!
 I grew up with my mother always baking cakes, for both my sister and I to take to school fetes and parties, and among those bakes were jam splits: welsh cakes with jam in the middle.
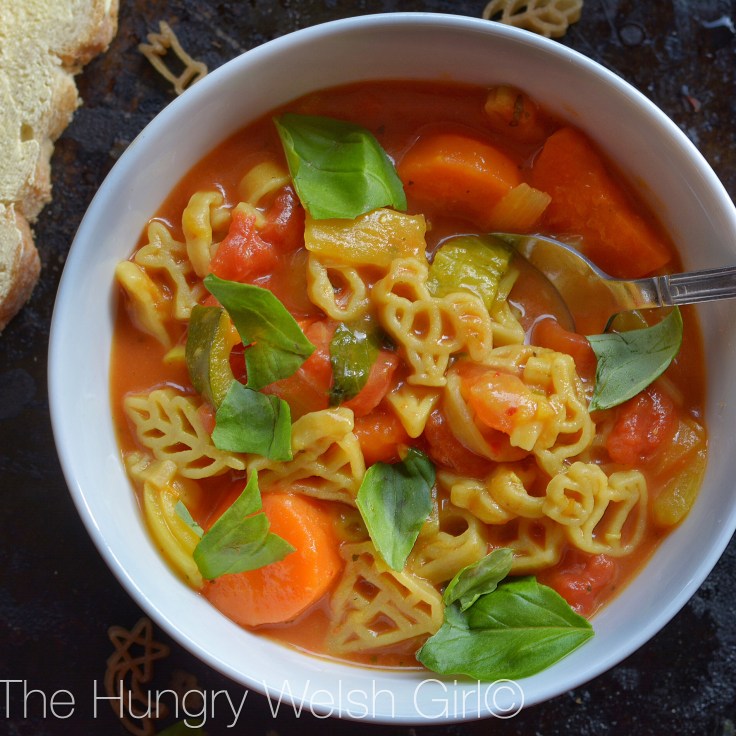 A quick chunky minestrone soup for an on-the-go snack or as part of a lunch break. It can even double up as a toast topper when thickened – think childhood favourite; alphabet spaghetti. I used Rizopia brown rice pasta shapes in my chunky minestrone soup, but obviously any pasta will work.
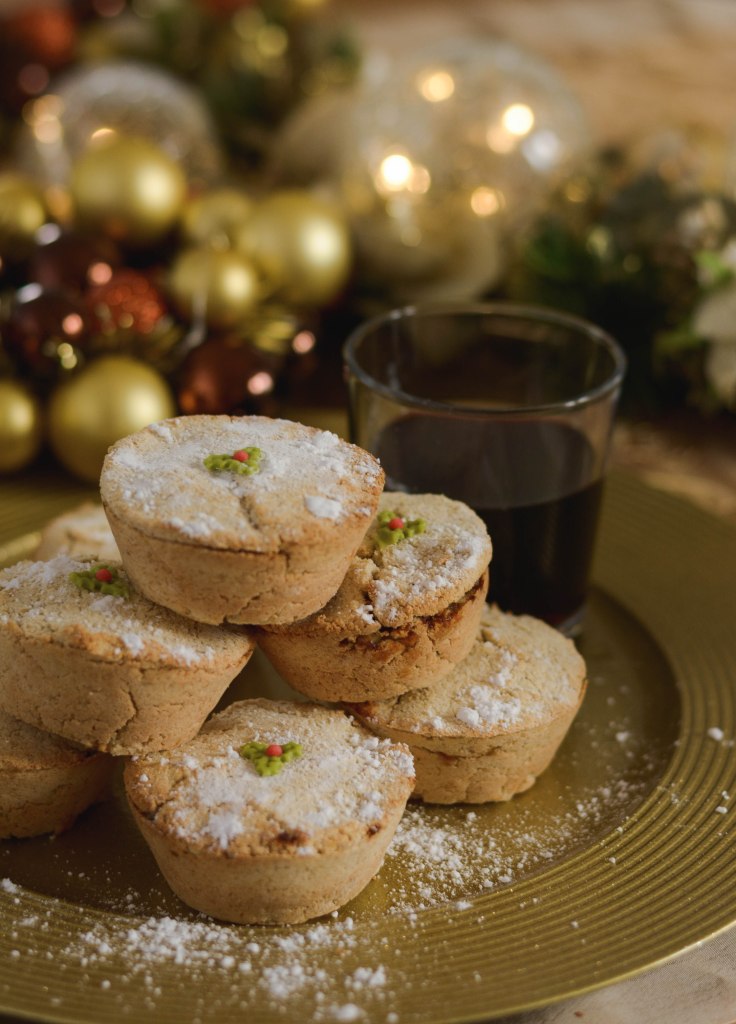 We all know Santa loves a mince pie or two, but we also know that sometimes mince pies contain alcohol and drinking and driving is strictly prohibited – even for the elves – which is why these mince pies are alcohol free. I haven’t had a mince pie all year, so I was anxiously anticipating for the day to arrive when I could make my own and that day just so happened to be Friday – a week away from Christmas day – and they were worth the wait. I used the marmalade which I had left over from my St Clemente tartlets in my own variation of mince meat and I was impressed; I also added some Irish cream flavouring from the Skinny Syrups range too.
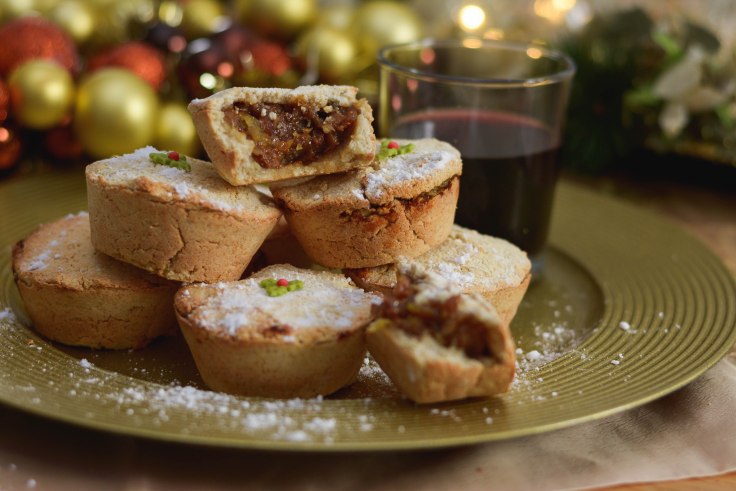
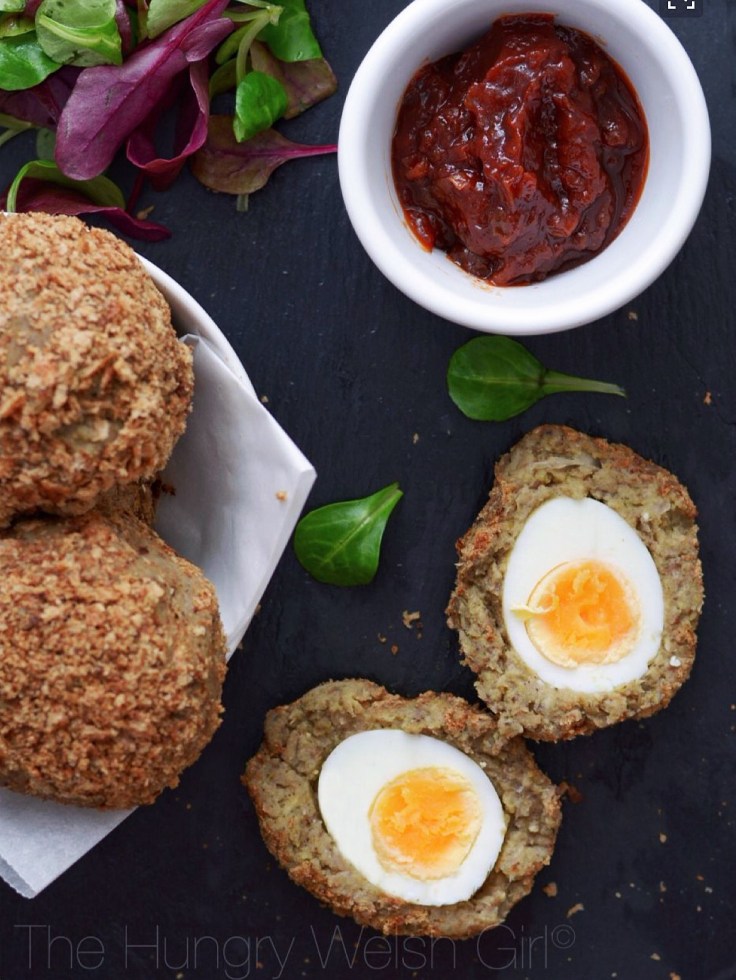 Scotch eggs were always a favourite of mine when I was a kid, until I learned what they were actually made of and while Quorn do vegetarian scotch eggs, I have to eat the whole pack just to feel satisfied. So, last night I wrote this recipe with monster scotch eggs in mind and they certainly were huge – the size of my palm. Now I know what you’re all thinking, these are going to be complicated with weird ingredients that you don’t have in your cupboards and I would have to disagree with you all because you should have these ingredients in your cupboards and if you know how to use a food processor, you’re half way there.
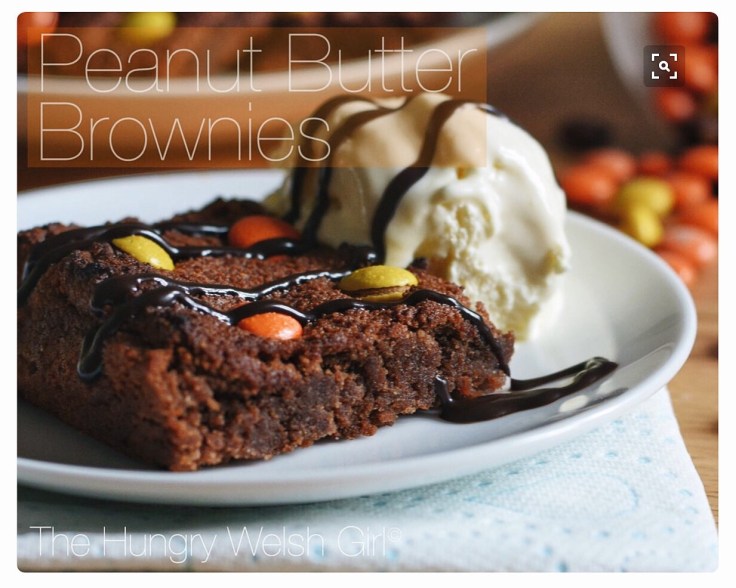 Looking for a quick dessert recipe for the weekend, with minimal ingredients? Look no further because these peanut butter brownies take less than 20 minutes and have only three ingredients; well five if you count the baking powder and sweetener, but we won’t.😉
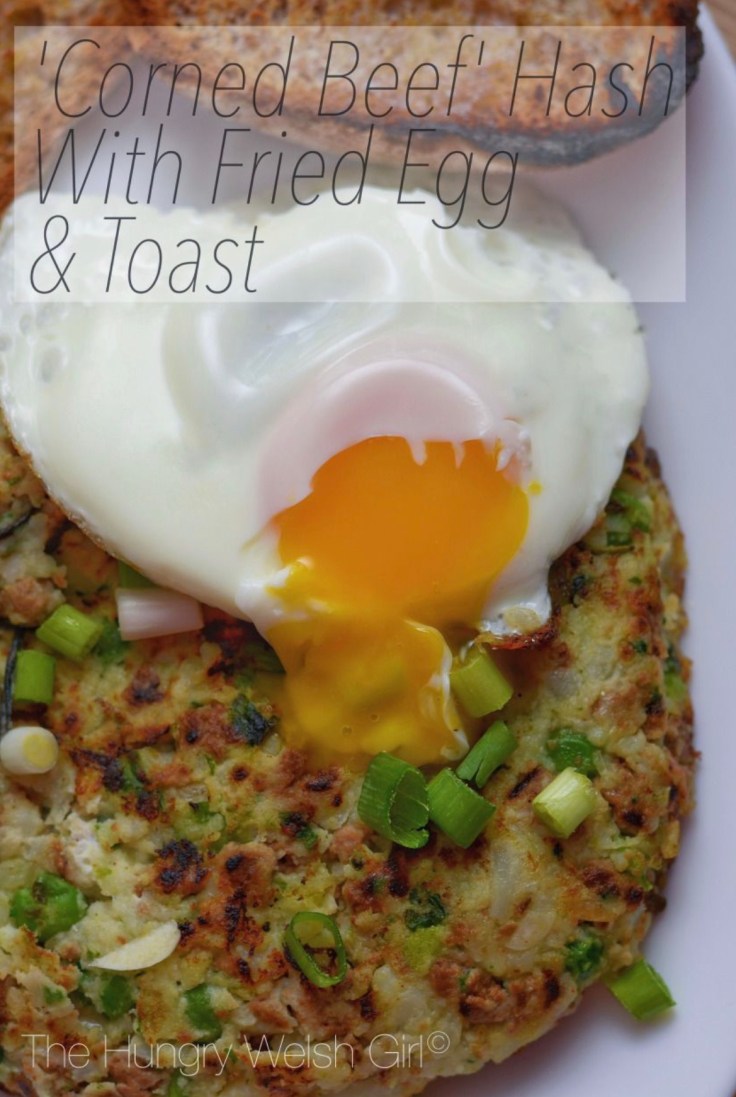 Were you a person who enjoyed a hearty corned beef hash before you crossed over to the vegetarian side? Yeah. Me either, but I was watching Diners. Dives & Drive-Ins on the food network the other night and someone had made this exact dish, as a carnivore meal. I couldn’t remember the ingredients as it was 3am, so I threw this together this morning using leftover potato mash, cauliflower and peas; which my family had left from a dinner last night. Even though this was made with Quorn mince, I didn’t think I was going to enjoy it as much as I did. Thankfully Quorn mince is a lot more visually appealing than corned beef and a lot tastier, as well as being vegetarian – I couldn’t live without it. I don’t like to toot my own horn often, but my vegetarian ‘corned beef’ hash was full of flavour and didn’t require any additional sauce either, as the yolk acted like a natural sauce and when each element was spread on some warm, buttered wholemeal, crusty bread, this was definitely one meal I didn’t want to end in a hurry and the best part of all was that I didn’t feel bloated after it either.